How to Create a Realistic AI Video for Free in 2026 (Step-by-Step)
I first realized how powerful AI video had become while scrolling on Instagram. I saw a product video that looked professionally filmed with great lighting and smooth movement.
Then I read the caption and found out it was made with AI in about 10 minutes using free tools. That moment completely changed how I looked at video creation.
After that, I tested many free AI video generators. Most of them didn’t look good and felt very fake. But a few tools stood out and were able to create videos that looked surprisingly real. The progress in just the last year has been huge.
You no longer need expensive software, cameras, or special skills. Anyone can create a realistic AI video for free now. If you can type what you want to see and click a button, you can make professional-looking videos for free.
In this guide, you’ll learn step by step how to create realistic AI videos for free using Kling AI, one of the best and easiest tools for beginners.
Why Kling AI Is the Best Choice for Beginners
After testing many free AI video tools, Kling AI is the one I recommend most for beginners who want realistic results without paying.
First, the video quality is very impressive for a free tool. Kling AI creates smoother movement and more natural motion than most other platforms. Objects move in a way that feels more realistic, not stiff or glitchy.
Another big reason is the free plan. Kling AI gives you 66 free credits every day, and they reset every 24 hours. This means you can practice daily without worrying about running out of credits for the whole month.
Kling AI also lets you generate longer clips than many free tools. While others limit you to very short videos, Kling can create 5–10 second clips, which feels much more useful for real projects.
The platform is also very easy to use. The interface is clean and beginner-friendly, so you don’t need technical knowledge or complicated settings. You just type what you want and generate.
Finally, Kling AI supports both text-to-video and image-to-video. This gives you more flexibility and allows you to grow your skills over time instead of being stuck with one method.
How to Create a Realistic AI Video for Free
Here’s the process of creating realistic AI videos for free.
Step 1: Create Your Free Kling AI Account
Getting started with Kling AI is quick and easy. You can create a free account in just a few minutes.
Go to the Kling AI website and click the sign-up button. You can register using your email or sign up with a social media account for faster access. The sign-up process is simple and similar for most regions.
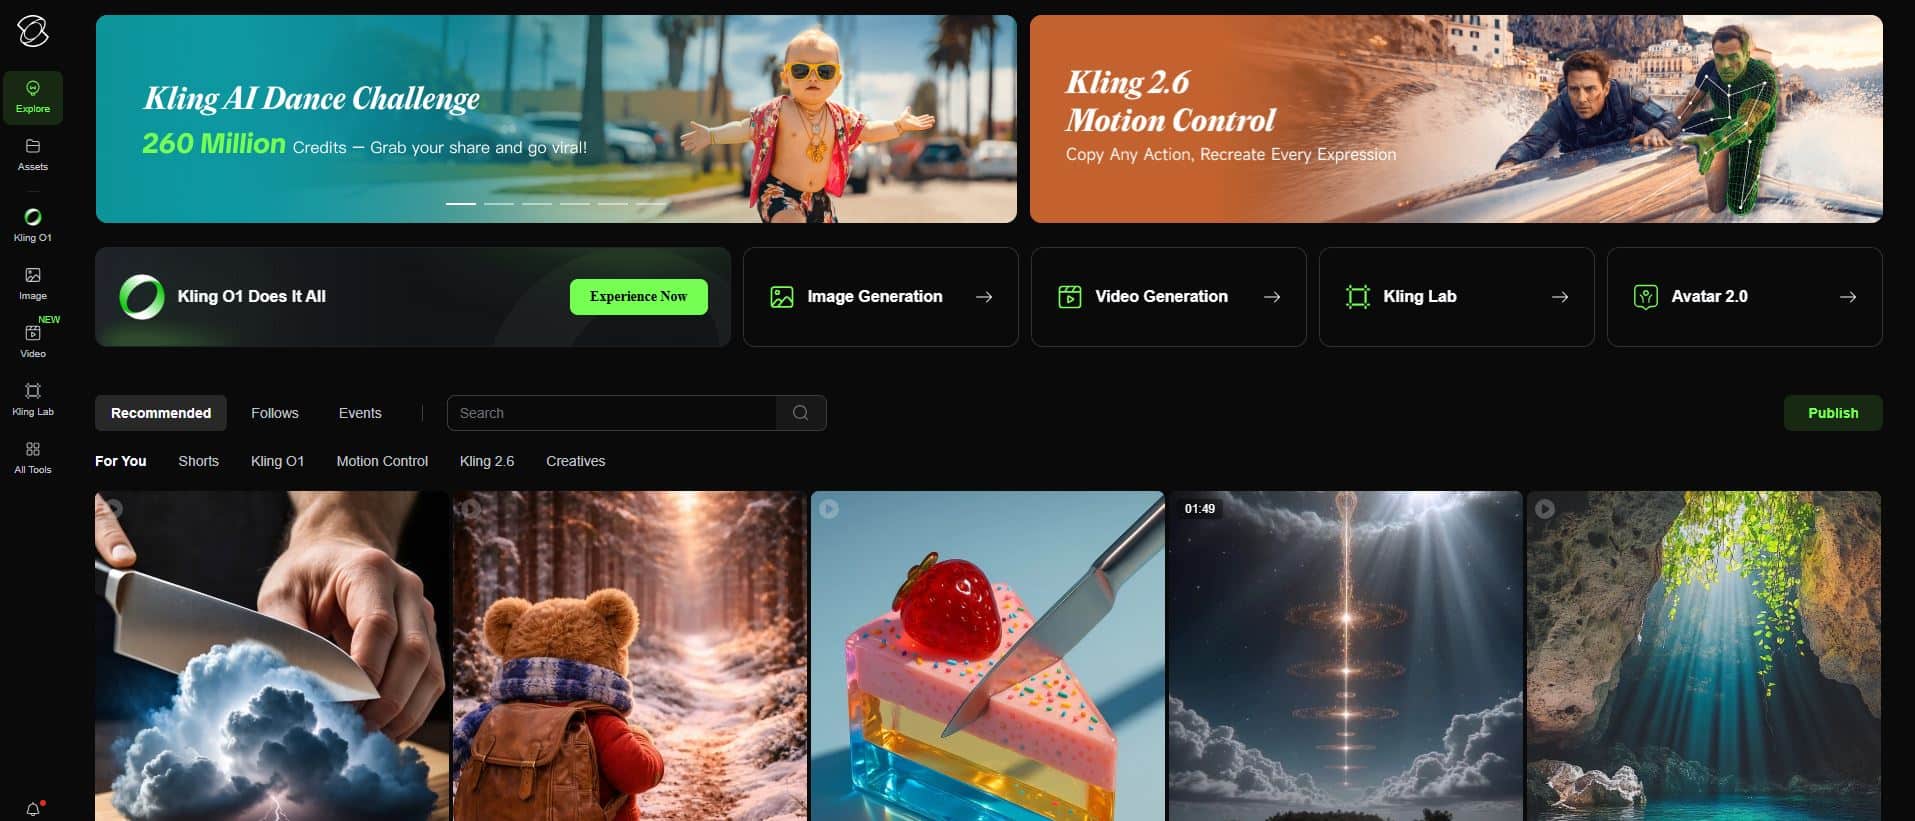
After logging in, you’ll see the main dashboard. The layout is clean and easy to understand. You’ll find options for text-to-video, image-to-video, and a library where your videos are saved.
Your free account gives you 66 credits every day, and they reset every 24 hours. This is great for beginners because you can practice daily without worrying about running out of credits for the month.
Creating a video uses credits based on length and quality. A normal 5-second video usually costs around 35–40 credits, so you can make 1–2 videos per day for free.
Before creating your first video, take a few minutes to explore Kling AI’s example gallery. It shows what the tool can create and gives you prompt ideas you can learn from and reuse.
Step 2: Learn the Kling AI Video Interface
Kling AI’s video creation screen is easy to use, even if you’re a complete beginner. Once you understand the basics, creating videos becomes very simple.
At the top, you’ll see a text prompt box. This is where you type what you want the video to look like. The AI uses this description to create your video, so clear and simple prompts work best.
Below the prompt box, you’ll find a few important settings:
Video Duration
This controls how long your video is. Free users can usually choose between 5 and 10 seconds. Start with 5 seconds to save credits while learning. You can always join multiple short clips later if you need a longer video.
Aspect Ratio
This decides the shape of your video:
- 16:9 for YouTube or landscape videos
- 9:16 for TikTok, Reels, and Shorts
- 1:1 for Instagram posts
Picking the right size early saves time later.
Quality Settings
Standard quality uses fewer credits and still looks great. High quality looks sharper but costs more credits. For beginners, standard quality is more than enough.
Generation Mode
Kling AI offers Standard and Pro modes. Standard mode is free and works very well for realistic videos. Pro mode is paid, so you don’t need it for this tutorial.
Once these settings are clear, you’re ready to start creating your first AI video.
Step 3: Write Better Prompts for Realistic Videos
The most important skill for creating realistic AI videos is writing good prompts. Simply put, the better your description, the better your video will look.
Start by clearly describing the main subject and action. Avoid vague phrases like “a nice scene.” Be specific.
For example, instead of “a beautiful lake,” say “a calm mountain lake at sunrise with light mist over the water.” Clear details help the AI understand exactly what to create.
Next, add lighting, mood, and atmosphere. These details make a huge difference.
“A forest” is basic, but “a foggy pine forest with soft morning sunlight shining through the trees” feels much more realistic and cinematic.
You can also describe camera movement to improve realism. Simple phrases like:
- “slow camera moving forward”
- “aerial view slowly coming down”
- “wide shot with no movement”
help the AI create smooth and professional-looking motion.
Mentioning a visual style gives you even more control. Words like cinematic lighting, shallow depth of field, golden hour, or documentary style guide the overall look of the video.
Here’s a quick example:
Weak prompt:
“a sunset at the beach”
Better prompt:
“a peaceful beach at golden hour with soft waves, warm orange sky, slow-motion movement, cinematic lighting, shallow depth of field”
Finally, keep your prompts simple and focused. Don’t describe too many things at once. One strong scene works much better than trying to force multiple ideas into one video.
Clear, simple prompts = more realistic results.
Step 4: Generate Your First AI Video
Now it’s time to generate your first realistic AI video using Kling AI.
For beginners, it’s best to start with a nature scene, since AI handles these very well. Copy and paste this prompt into Kling AI:
Prompt:
“A peaceful forest stream flowing over smooth rocks, sunlight coming through the trees, slow camera moving along the water, cinematic depth of field, realistic colors”
Set the duration to 5 seconds. This helps save credits while you’re learning.
Choose the aspect ratio based on where you’ll use the video.
- Pick 16:9 for YouTube or general use
- Pick 9:16 for TikTok or Reels
Select Standard quality. It looks great and uses fewer credits, making it perfect for beginners.
Click Generate and wait. It usually takes 2–5 minutes. Don’t refresh the page while it’s generating.
Once the video is ready, click it to preview. Watch it carefully and check:
- Does the movement look smooth?
- Does the lighting feel natural?
- Does anything look strange or broken?
If you like the result, click Download. The video will save as an MP4 file that you can use anywhere.
If it’s not perfect, that’s normal. Change your prompt slightly and try again when your credits refresh. Creating AI videos is all about testing and improving. The more you experiment, the better your results will get.
Step 5: Improve Your AI Videos with Advanced Techniques
Once you’ve created your first realistic AI video for free, you can improve your results by using a few simple advanced techniques. Small changes in how you describe your scene can make a big difference in how real your video looks.
Try experimenting with camera movement descriptions, as Kling AI responds very well to them. Simple phrases like “slow camera moving forward,” “smooth left to right movement,” “handheld natural motion,” or “static shot” can completely change the mood and professionalism of your video.
Lighting and time of day are extremely important for realism. Kling AI does a great job with clear lighting cues, so use phrases like “golden hour sunlight,” “soft cloudy lighting,” “blue hour evening light,” or “bright midday sun with natural shadows” to get better-looking results.
Adding simple style words can also improve quality. Terms like “cinematic look,” “professional video,” “film-style lighting,” or “realistic camera quality” help guide the AI toward more polished and natural visuals.
If you want more control over the final look, use the image-to-video feature. Start with an image that already has the mood or style you want, then animate it. This helps keep your videos consistent and closer to your vision.
To get around short video limits, create several related 5-second clips using similar prompts and combine them later in a video editor. This allows you to build longer videos over time using only free daily credits.
Finally, pay attention to which prompts work best and save them for later. Keeping a small list of successful prompts and settings will save time and help you create better videos more consistently.
Alternative Free AI Video Generators to Try
Runway is the best place to start, but these AI video generators are also worth testing.
Runway ML
Runway ML Focuses on professional-grade video generation with excellent quality output. The free tier provides monthly credits rather than daily, and the interface is slightly more complex but offers more advanced control. Runway excels at maintaining consistency and produces very cinematic results when prompted correctly.
Pika Labs
Good for creative and artistic videos. Easy to use, but videos may look less realistic than Runway.
Stable Video Diffusion
Completely free and open source, but you need technical skills and a strong computer. Not ideal for beginners.
Leonardo AI
Best known for images, but now offers video tools. Free plan is generous and works well if you already use it.
Genmo AI
Very simple and beginner friendly. Free plan is limited, but good for quick tests and basic videos.
Each tool gives different results. Try the same prompt on a few platforms and use the one that looks best for your project.
Final Thoughts
Creating realistic AI videos for free is now possible for anyone. What once felt like science fiction is now real, thanks to tools like Kling AI. Just a few years ago, this level of quality seemed impossible.
You don’t need video skills or expensive equipment anymore. If you can write a short description and click a button, you can create professional-looking videos using free AI tools.
The key is to use AI for what it does best. It works great for nature scenes, product shots, background visuals, and cinematic moments. Don’t fight the tool. Work with its strengths.
Practice matters a lot. Every video you generate helps you learn what works and what doesn’t. My first AI videos were not good at all, but testing different prompts helped me improve fast.
AI video tools are getting better every month. Things that feel hard today will be easy soon. Starting now gives you a big advantage as the technology keeps improving.
Don’t wait for perfect results. Your first videos won’t be perfect, and that’s okay. Create something today, learn from it, and keep going.
Free AI video tools are changing content creation for everyone. Now is the best time to experiment, learn, and see what you can create when the usual barriers are gone.

7 Fastest Ways to Make Money with AI in 2026

5 Best AI Email Writing Tools of 2026 (Ranked and Reviewed)

7 Best AI Video Generators in 2026 (That Work Without Editing Skills)
About Author
Alma Coul
Alma is the founder and CEO of Eagles Digital. He is an SEO expert and has over seven years of experience in Web programming and building visibility for businesses through content marketing.